You should have already followed steps 1 through 9b here before continuing with this document.
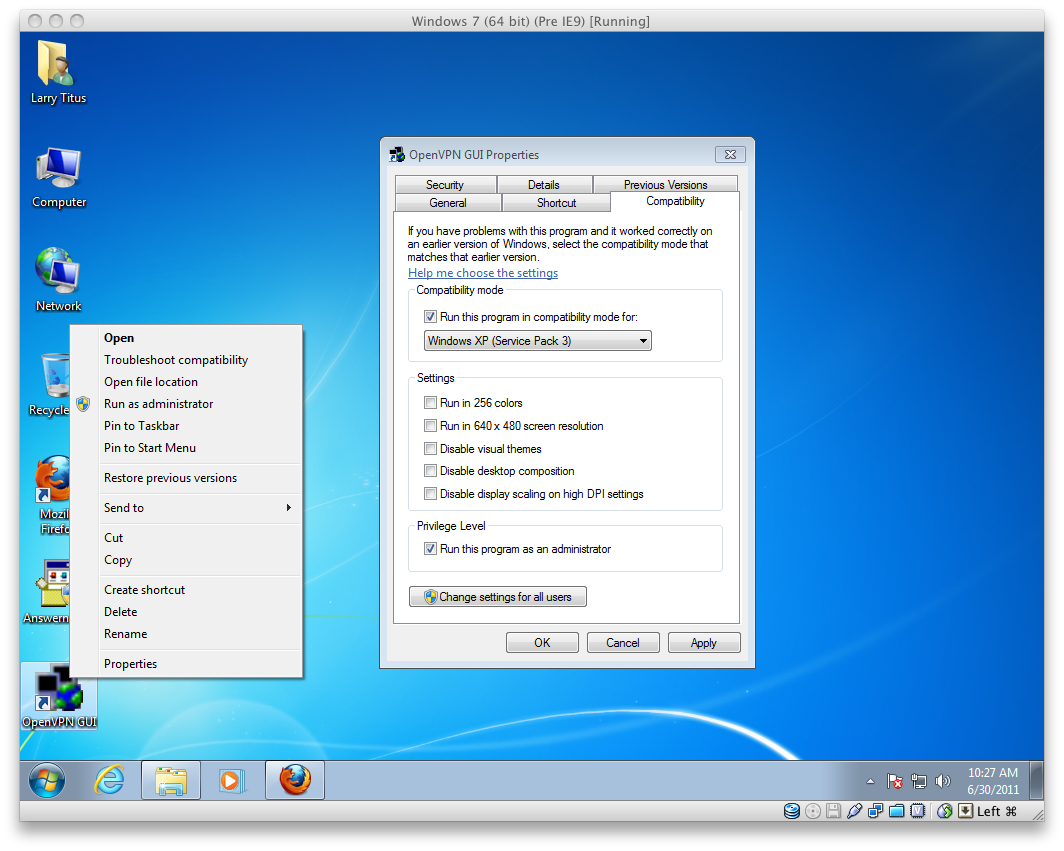
9c) Right click the "OpenVPN GUI" shortcut that is now on your desktop, select "Properties" and click on the "Compatibility" tab. Check "Run this program in compatibility mode for" and select "Windows XP (Service Pack 3)". Also check "Run this program as an administrator" and "OK".
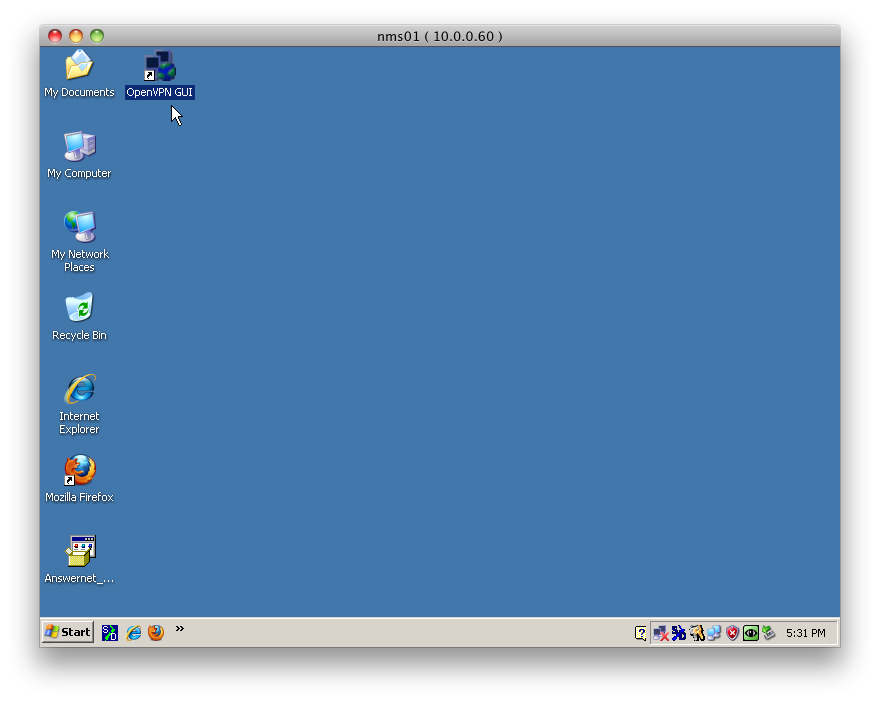
9d) Double click on the "OpenVPN GUI" shortcut on your desktop.
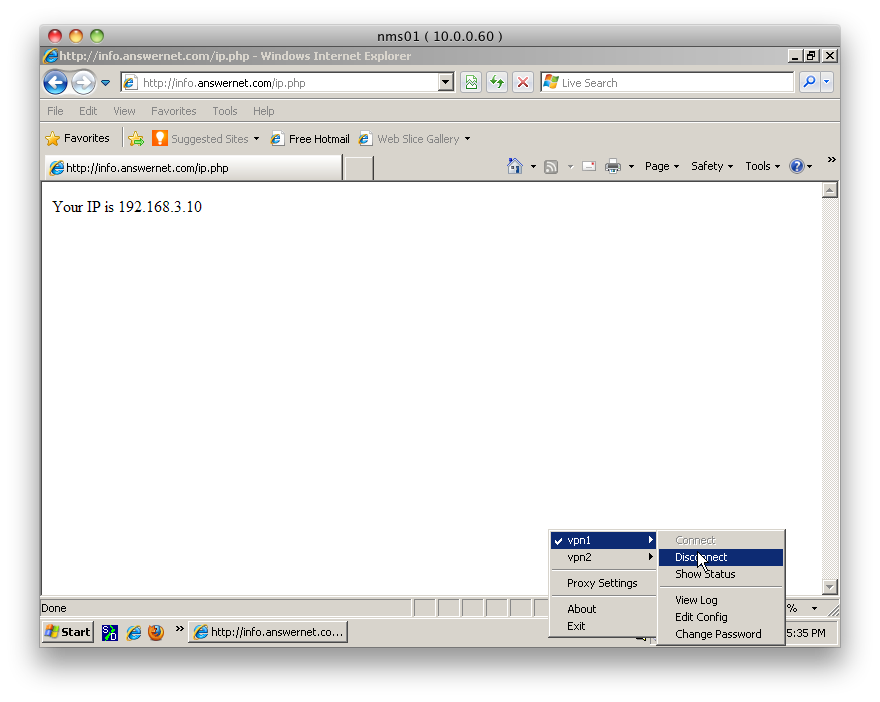
10) Right click the OpenVPN 'Computer and Globe' icon in the task tray.
11) Navigate to "vpn1" and hit "Connect". The "vpn2" currently should not be used and will not work. This is a placeholder for a future backup connection to connect the VPN.
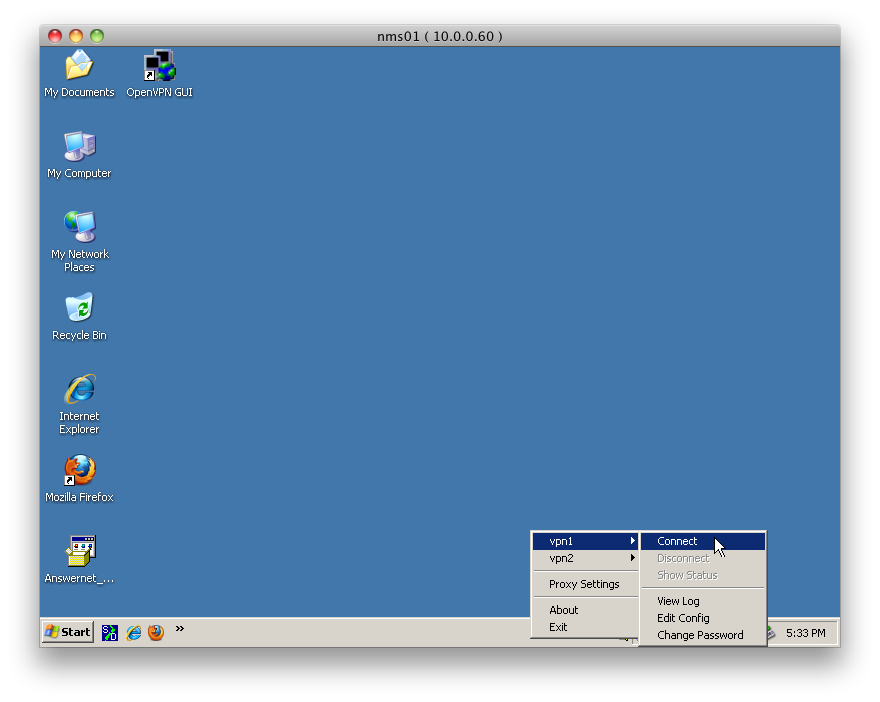
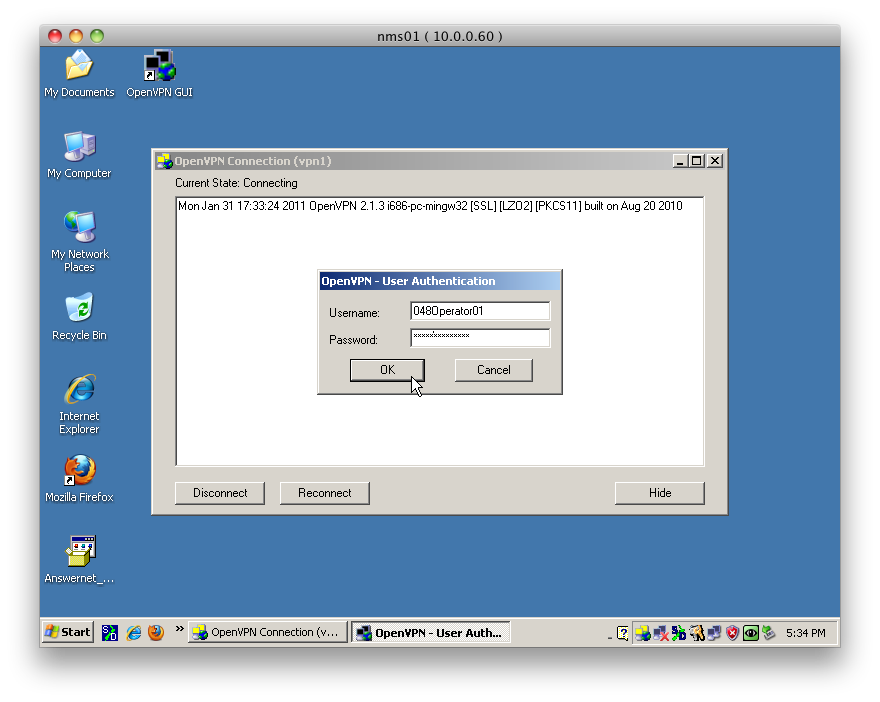
12) When prompted, enter your Active Directory username and password (Tech Services, General Managers, and O+1's only) or your assiged remote operator ID (example: 010RemoteOperator01).
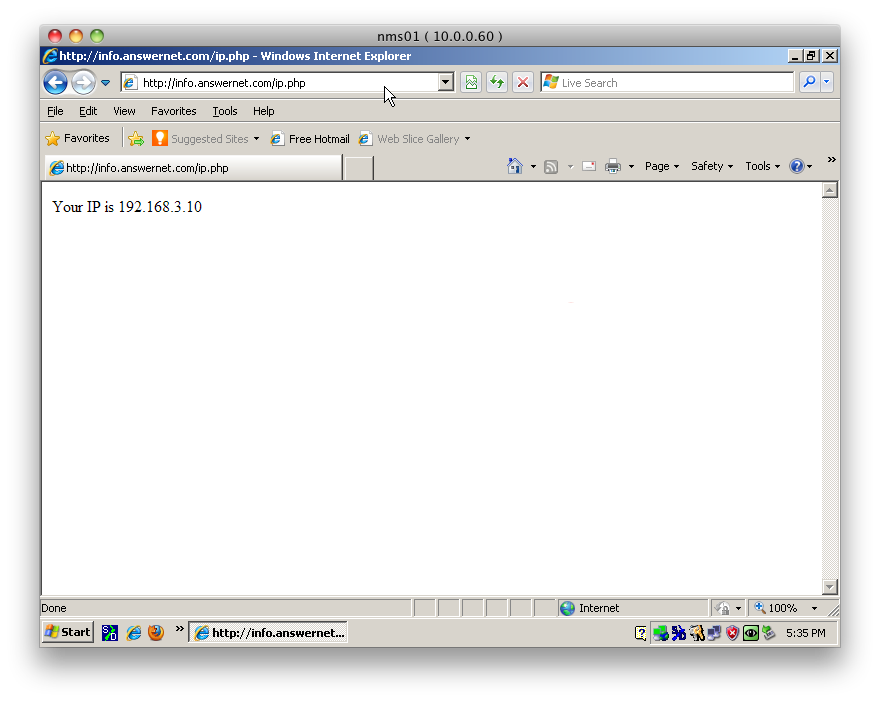
13) Optional: Check your computer's IP address by going to http://info.answernet.com/ip.php. If successfully connected it should should start with 192.168.5.x.
**Note: The OpenVPN icon is red when the VPN is disconnected, yellow when attempting to connect, and green when successfully connected. Once connected you may connect to any internal IP address (192.168.x.x) the same as if you were physically in the office.
14) To Disconnect: Right click on the OpenVPN icon and choose disconnect when you no longer need to be connected.